Clem's Detroit
Style Pan Pizza
This pizza style originated in Detroit, USA where pizza dough was "fried" in tins (pans) which were used for automobile manufacture. This style is characterized by a thicker depth of open crumb pizza (like a focaccia), crispy/crunchy edges of caramelized cheese (towards being burnt), and a crispy/crunchy base. This effect is enabled by the pizza being cooked with a liberal dose of oil (usually olive) in the baking tin (it is basically fried).
Not having made a focaccia before, I had a steep learning curve in getting the quantities for the dough and the proofing correct. I share with you today, a procedure that worked for me.
Here's how you
make a Detroit-style pan pizza.
INGREDIENTS
- 200 g
pizza flour (or bread flour).
This quantity makes two dough balls to make two pan pizzas with my size of pizza pan (see below).
- 160 g
water.
This will bring the dough to 80% hydration - a very wet dough.
- 3 g Active
Dried Yeast.
- 11 g Olive
oil.
- Salt.
This is not really necessary as the cheese and cured meats which you may use as toppings will be salty in taste already.
If you would like, you can around 3 g of salt.
- Shredded
Mozzarella cheese (low moisture if possible).
I used a bought blend of mozzarella, cheddar and Parmesan.
- Optional:
Shredded cheddar and Parmigiano Reggiano.
- Your
choice of protein.
I used Spanish chorizo (sliced).
- Olive oil
for coating the pan.
- Pizza pan.
For the dough amount above, a pan 24 cm X 16 cm was used.
Pans of sizes different to this will affect the thickness of the resulting pizza.
METHOD
Prepare the pizza
dough
-
Add the wet ingredients to
the dry ingredients and mix with hands or a spatula until
smooth.
-
Let the dough rest for some
15 to 30 minutes.
-
Since this wet dough will not
be easily kneaded, you will need to rely on the stretch and
fold method to develop the gluten (by grabbing a portion of
the dough, pulling it and then folding it back onto itself).
Stretch and fold the dough 4 or 5 times from different angles and the let it rest for ten minutes. Repeat this several times.
-
Divide the dough into two and
form each into a ball shape as best you can, place them in
containers with a lids and then put it away in a
refrigerator for at least a day, going to as much as three
days.
Note that you can omit this step and go straight part of the procedure.
You will just miss out on some flavour development and perhaps a better gluten formation as well.
-
On pizza making day, take a
dough ball and let it come up to room temperature (at least
an hour or two depending on the ambient temperature of your
pizza parlour).
-
Oil your pizza pan (use olive
olive oil if you can) - oil up the sides of the pan too.
There should be visible oil on the bottom of the pan.
Deposit a dough ball into your pizza pan and pull it into roughly the shape of the pan while ensuring that the dough is evenly thick across the pan.
-
Now let the dough proof at 30oC
for some 3 hours.
-
During the proofing time,
adjust your dough to the shape of the pan if necessary
(gently pushing with finger tips).
Your dough is now ready for par baking.
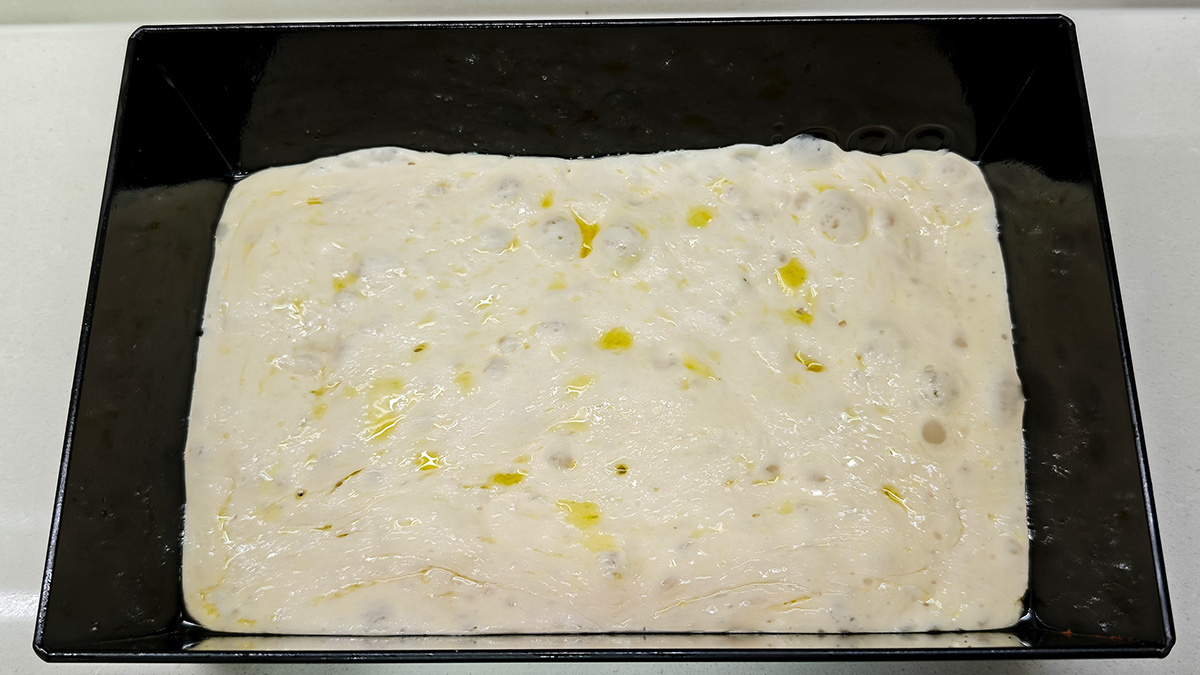
High hydration dough after
3 hours of proofing at 30oC
-
Set your oven to 200oC
(fan convection).
-
Par bake the dough in your
pan for some 10 minutes (or until the surface is slightly
browned).
This step is to "firm" up the delicate high hydration dough structure and its air pockets before adding toppings on top which may flatten out the dough if it is too soft.
-
Let the par baked dough cool
off before adding toppings.
Cool enough is when cheese laid on top does not start to melt.
Note that you can omit this par baking step but no guarantees are made as to whether your dough will rise as well due to the weight of the toppings.
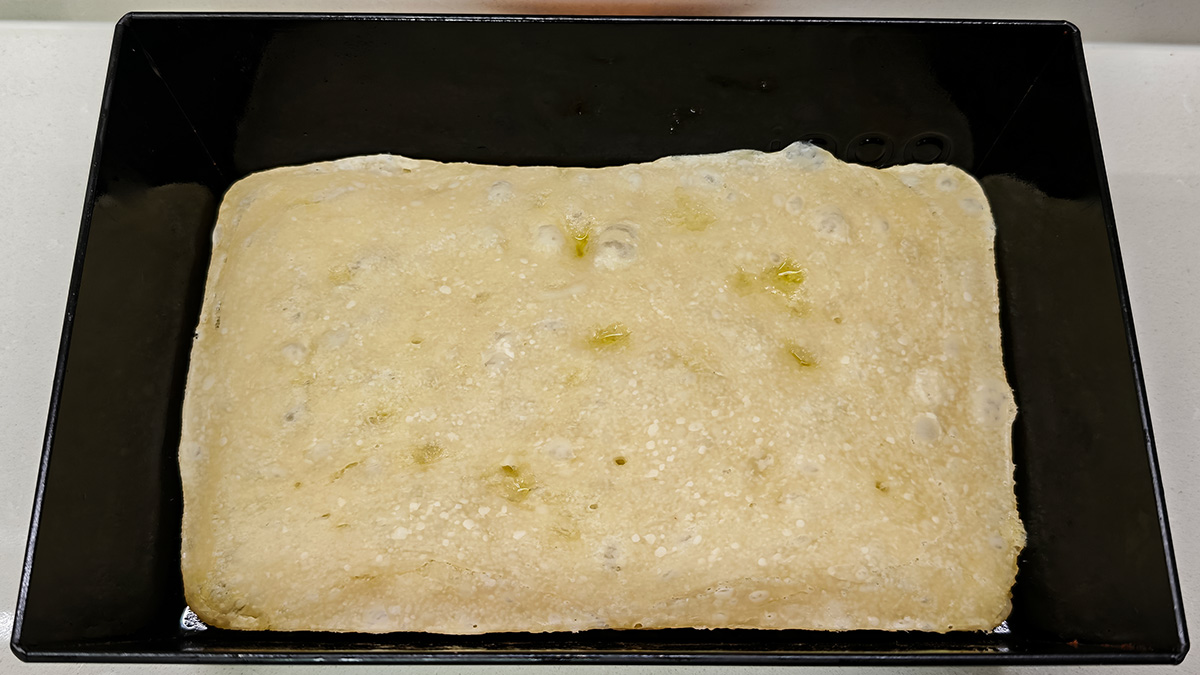
High hydration dough after
par baking at 200oC for 10 minutes
-
Lift the par baked dough to
check that the bottom of the pan still has enough oil for
the next step. If dry, add some more oil. This will be
necessary to complete the frying process and also not let
the pizza stick to the pan.
-
With the par baked dough in
the pan, add the shredded mozzarella (or blend) liberally on
top, making sure that a large quantity is added to the edges
where pan wall meets the dough. This is essential for the
formation of the crispy/crunchy caramelized cheese typical
in Detroit pizzas (the edges are called "frico").
Optional: You may choose to add shredded cheddar to the edges where dough meets pan. This will be closer to the Detroit style where Wisconsin brick cheese is used for that purpose.
If you would like, now layer your choice of protein (cured meat) on top of the cheese and then layer a bit more cheese on top of the protein.
Do note that in Detroit pizzas, the protein is layered directly on top of the dough first and the cheese is added on top of the protein.
I do it differently because I have found that with par baked doughs, the protein will not adhere to the dough and will easily come off when slicing or eating the pizza. To ensure that any protein used sticks, it is best to have cheese on first.
-
Now you can add pizza sauce
on top of the assembly (usually in racing stripes).
-
Bake the assembly at 220oC
for some 15 minutes.
Do check the pizza constantly and adjust baking time so as not to have the pizza burn or not browned off enough.
-
When the pizza comes out, you
should see the oil bubbling away at the edges of the pan -
this is normal.
-
Let the pan cool down
significantly before taking a thin blade to separate the
sides of the pizza from the pan.
The with an angled spatula, lift the pizza out of the pan and place it on a wire rack to cool off.
Do not place the pizza directly on a hard surface when still hot as moisture being released from the pizza will make it soggy. Let some of the moisture evaporate off before placing your pizza on a surface for slicing. It is best to use a serrated knife to cut the pizza.
-
Serve before your pizza cools
right off.
You may choose to microplane some Parmigiano Reggiano on top of your pizza before serving (as I did).
You may also wish to add some greens on top just before serving.
Arugula (rocket) is a nice green topping for this purpose.
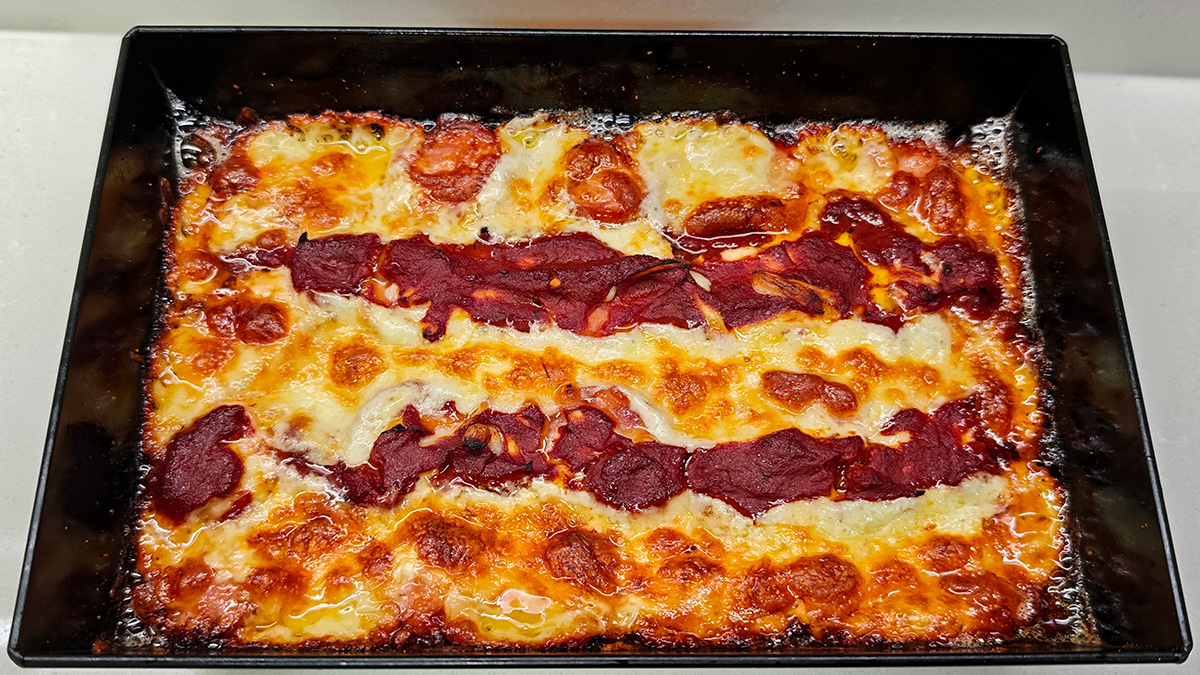
Clem's Detroit Style
Pan Pizza straight out of the oven
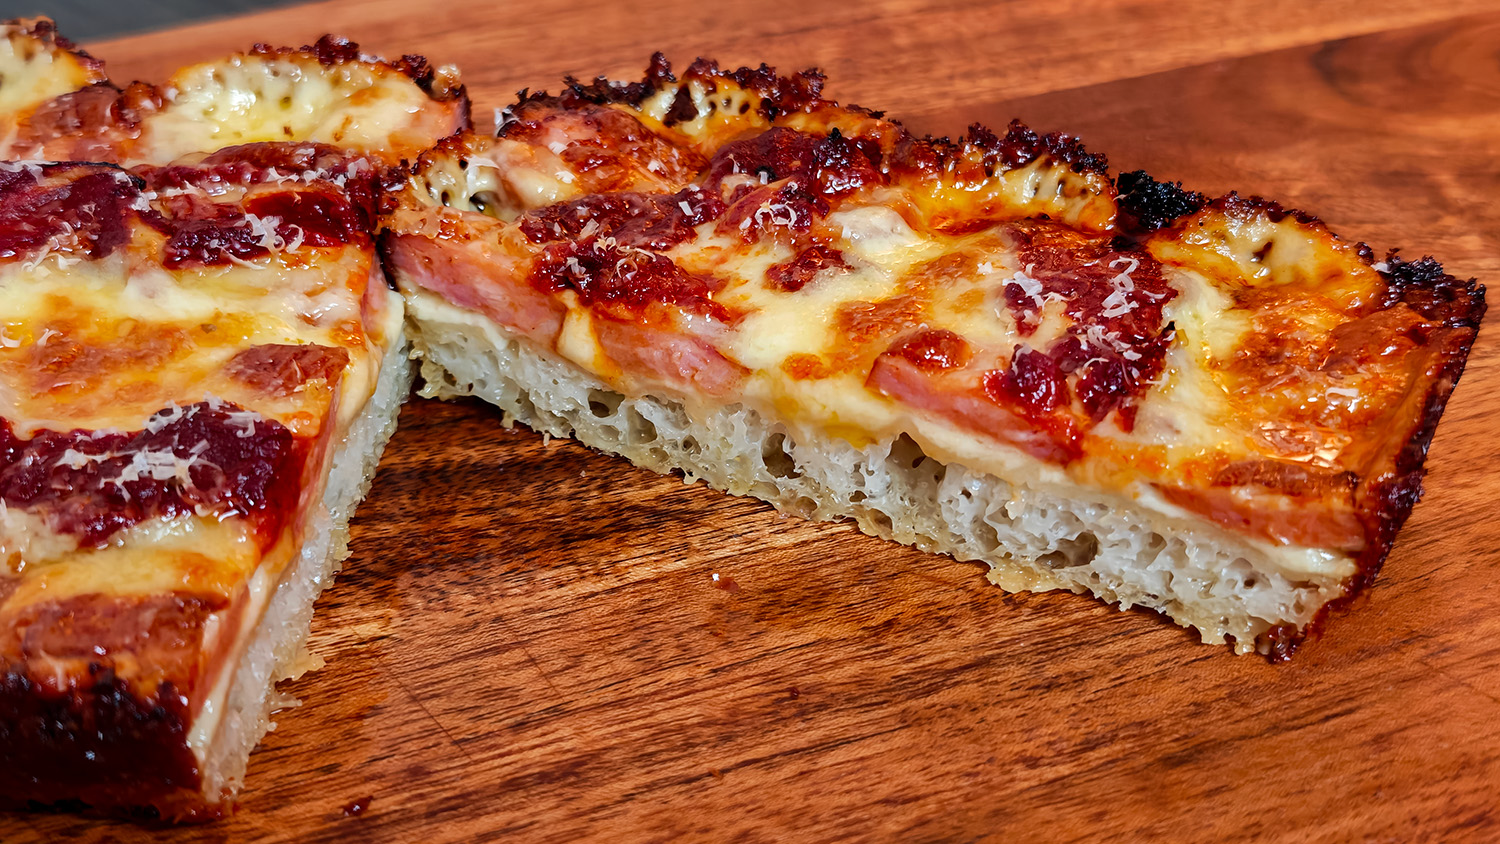
Open crumb pizza base
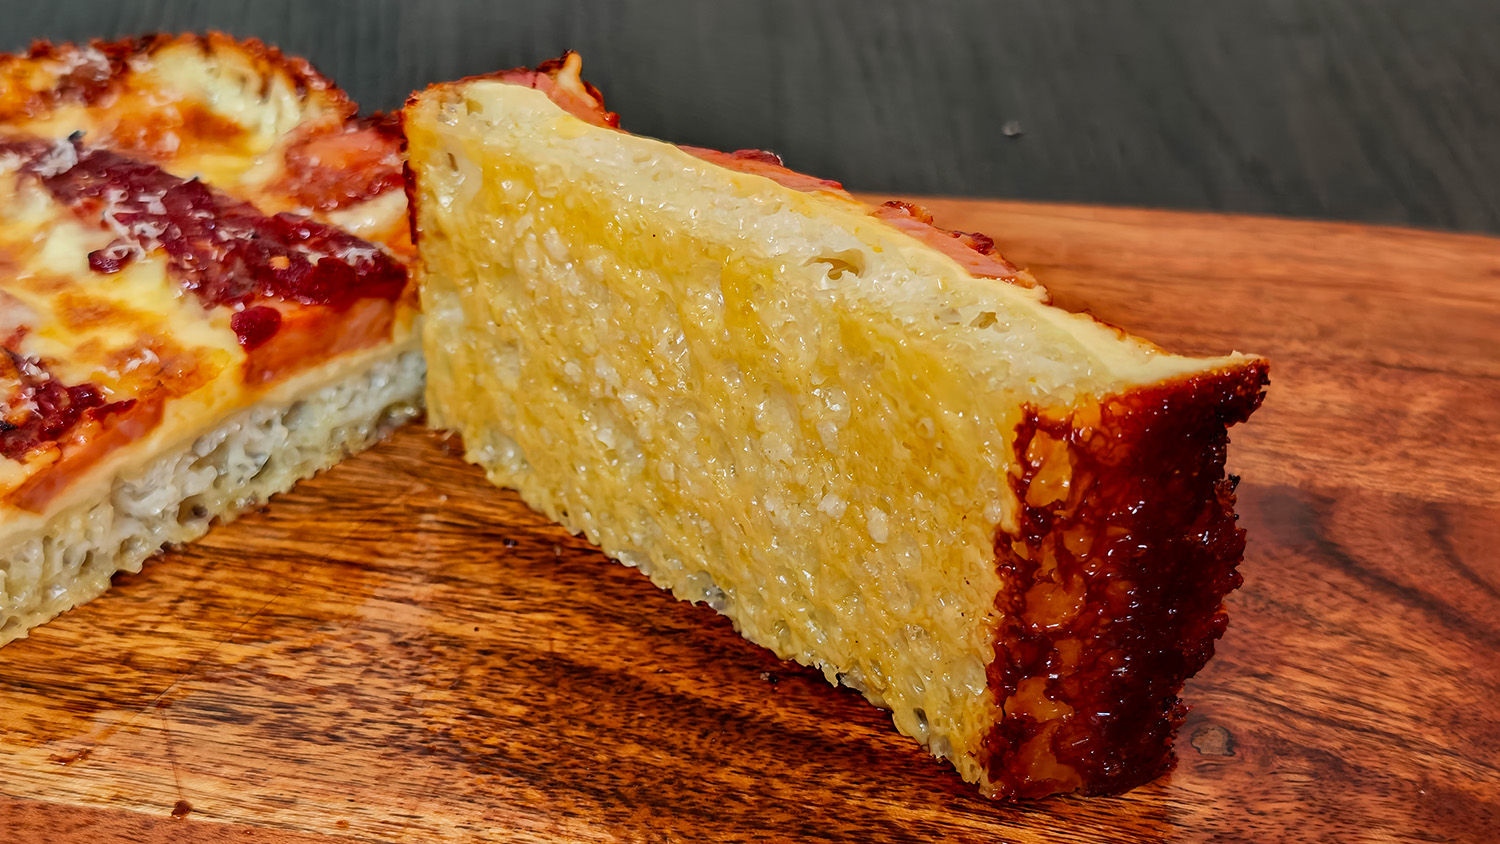
Fried bottom of pizza base
and the frico edge.
You could leave the pan in the oven for a few minutes longer
for a browner bottom base.
Yes, its an oily "fried" pizza. Place on absorbent paper to
wick away excess oil before serving if you wish.
ENJOY!
27 July
2026
Created by Clem Kuek
