Clem's
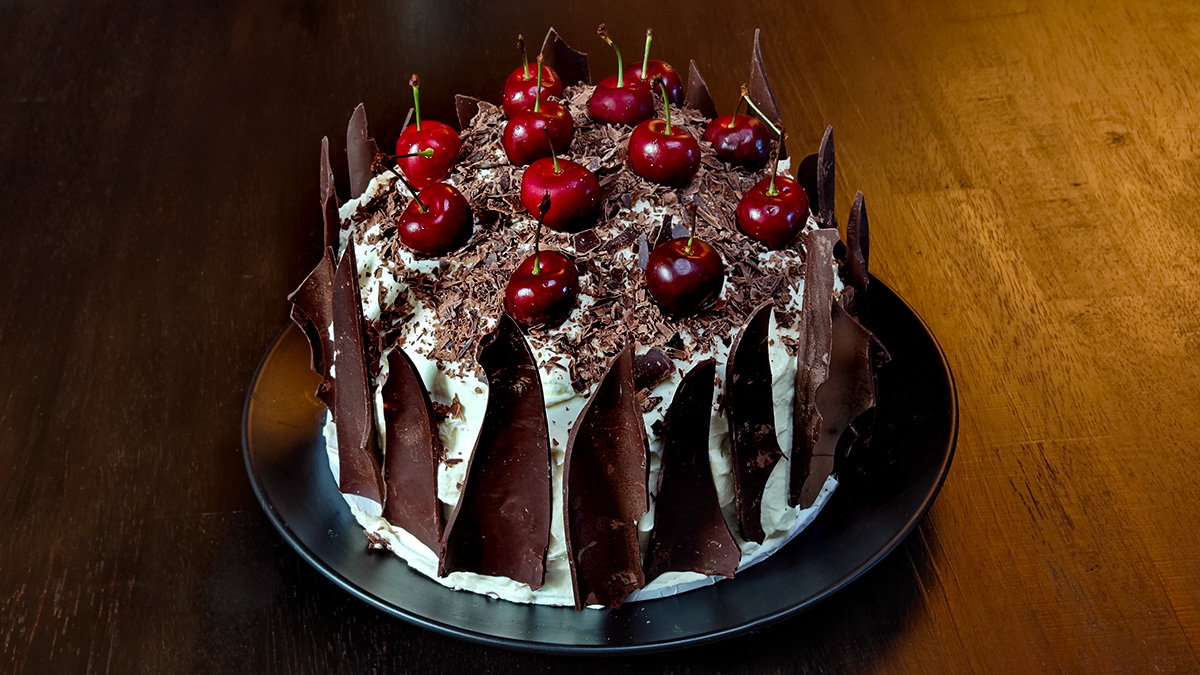
Black Forest style torte
When people say the "Black Forest" (Schwárzwald), they most often mean a large montane forest which is found in the South-Western state of Baden-Württemberg, Germany, which borders France and Switzerland.
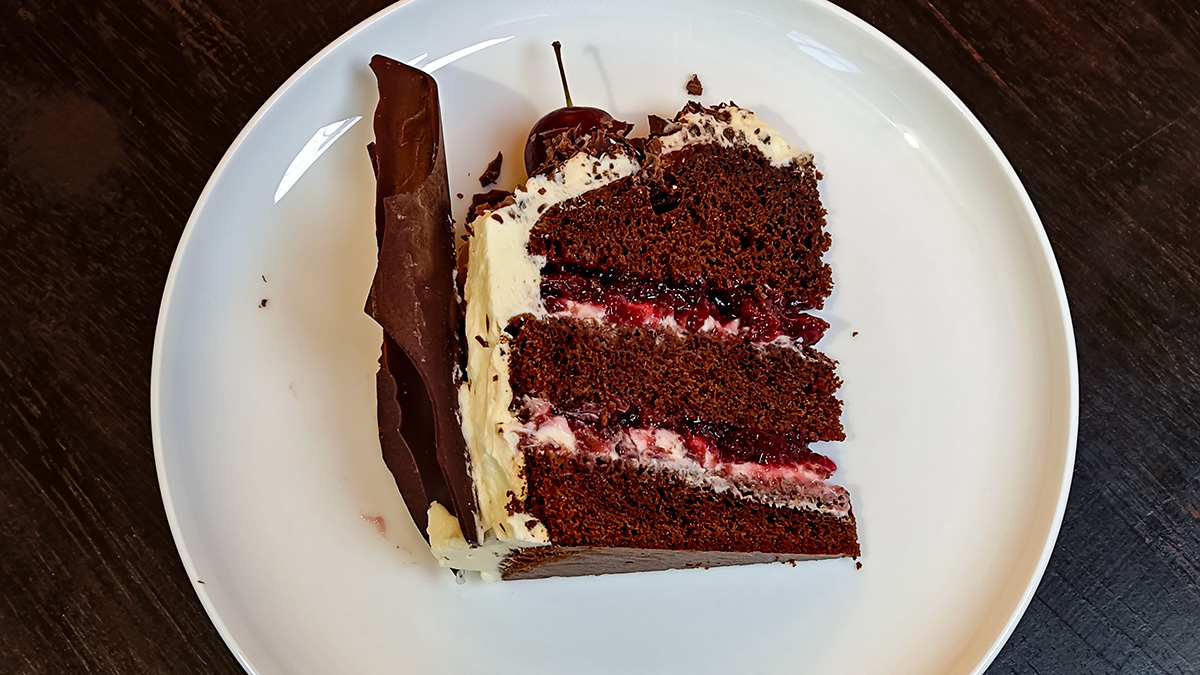
Although not certain by any means, the forest area is thought to be from where a chocolate and cream cake with cherry filling originated. The Black Forest cake (Schwarzwälder Kirschtorte - meaning Black Forest cherry cake ), comprises layers of chocolate sponge cake separated by whipped cream and cherry purée. The traditional Schwarzwälder Kirschtorte (and stipulated by German law) must have kirschwasser (a distilled alcoholic spirit made from sour cherries) added to it. In 2013, both the Times (UK) and the Telegraph (UK) newspapers reported that the Black Forest cake was granted special protected status from the EU.
I'm no German and nor do I reside in the Black Forest, thus, my
effort in recreating this famous cake must merely be called
"Black Forest Styled". Here is how you make one (without the
kirschwasswer in my case, although you can):
INGREDIENTS
- Ingredients to make
a rich chocolate sponge cake, 18 cm in diameter by 9 cm high
after baking.
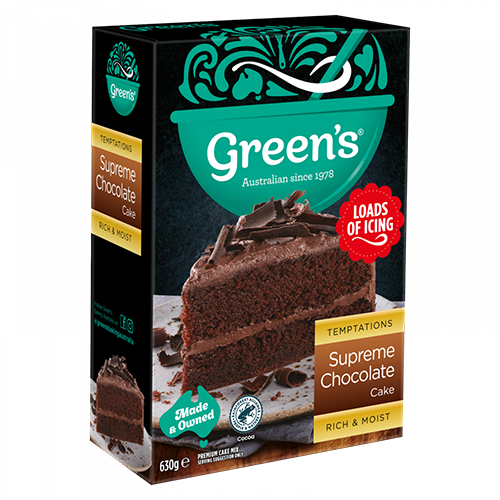
It is easy these days to buy a pre-mix from a supermarket.
I used Green's Supreme Chocolate cake (I did not use the included chocolate icing):
-
Two 415 g cans of Black
Cherries in syrup.
A table spoon of sugar or to taste.
-
3 - 4 heaped teaspoons
of cornflour (this is
just starch) to make a thick slurry with water.
-
500 g of heavy (or thickened) cream.
-
40 g of icing sugar.
-
370 g of dark (70% cocoa) chocolate (use cooking/baking chocolate).
-
A cake base to stand the cake on.
-
Some fresh cherries for garnishing.
METHOD
- Bake the chocolate
sponge cake.
Remove from the oven as soon as the cake is done otherwise the cake will dry out more in the residual heat of the oven.
Aim for a moist cake although this is fixable by soaking with cherry syrup at the assembly stage.
- When the cake is
cooled, slice the cake horizontally into at least three
layers.
Set aside.
- Make the cherry
purée:
- Drain canned
cherries while saving the syrup for later use.
Slice the cherries into halves (no smaller as the cherries will help keep the cake layers apart.
- Place the
sliced cherries in a saucepan and heat them up to boiling
with a little cherry syrup.
Keep the amount of syrup small at this time (enough to make the mass movable).
- Add a
tablespoon of sugar (or to taste).
- Dribble in an
amount of thick cornflour to make the mass thick (movable
but not runny - important as a runny
purée
will be squeezed out of the cake layers after assembly).
- Check that the
thickness of the
purée
is sufficient to stay in a cake inter-layer.
Thicken by adding more starch slurry - thin out by adding more cherry syrup.
- Drain canned
cherries while saving the syrup for later use.
-
Set aside the completed
purée
and let it cool.
-
Using a double saucepan method, melt the dark chocolate.
Double panning means to sit the pan containing the chocolate over another one containing boiling water.
Break up the chocolate into small pieces to aid in the melting process.
-
Heat until the chocolate over boiling water in the lower pan
until it is runny.
Stir the chocolate constantly.
-
Pour the runny chocolate over a large sheet of baking paper:
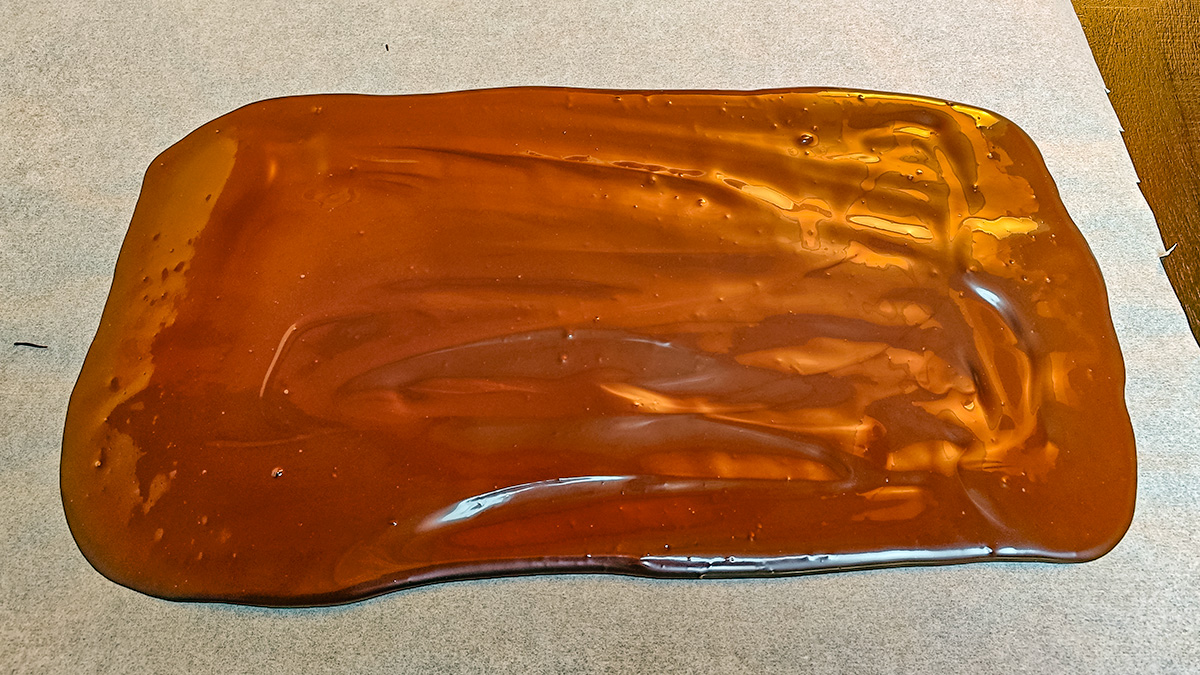
Molten dark chocolate on a baking sheet
- Thin out the
chocolate so that it is around 5 mm thick and no more.
The width of the chocolate layer should be more than the height of the assembled cake (you are going to place the shards against the side of the cake).
- Let the chocolate
harden a bit as it cools slightly but while it is still very
much pliable, tightly roll the baking sheet on itself to make a
spiral of chocolate when the latter hardens.
- Place the roll in a
refrigerator to harden.
- When hardened, take
out the roll from the refrigerator and unroll it carefully
while breaking off large long shards. The shards have to be
long enough the match the height of the cake (around 9 to 10
cm tall).
- Cut/shave small
bits from the roll to make shavings for cake top decoration.
- Keep in the refrigerator until use.
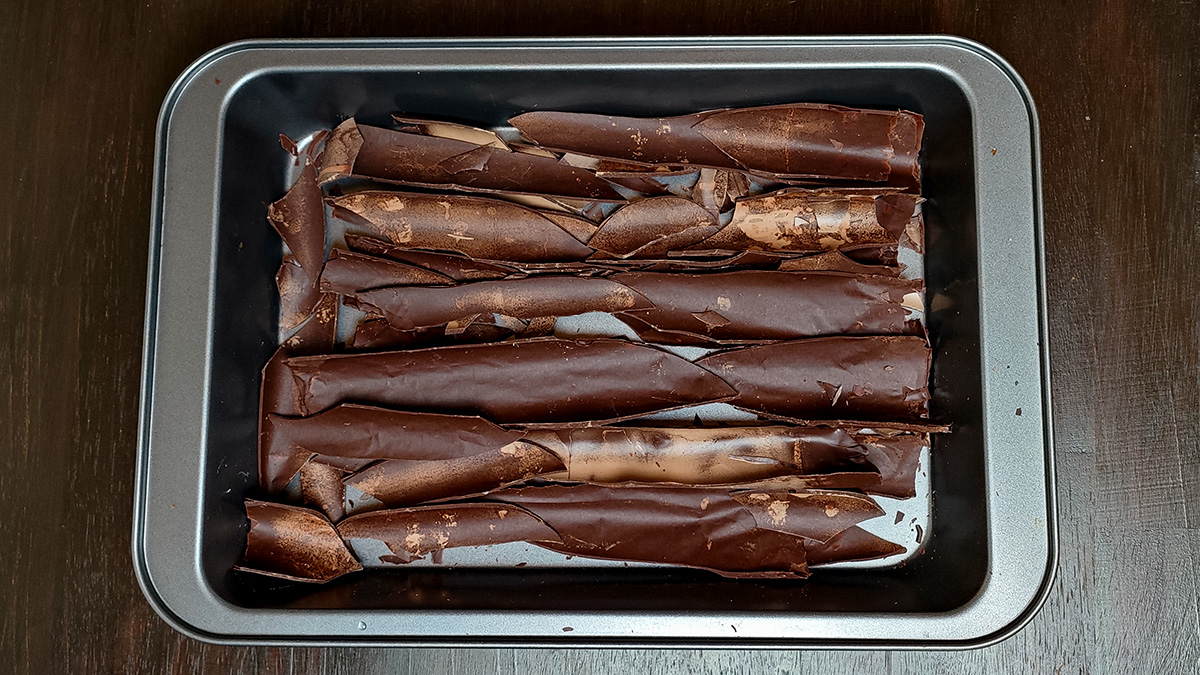
Shards of dark chocolate produced from a formed
roll of dark chocolate
-
Make the cream frosting:
-
Whip up 500 g of heavy cream with 40 g of icing sugar.
Whipping will take several minutes. Use a machine if you have one.
TIP: While whipping, add half a teaspoon of gelatine dissolved in a little boiling temperature water. This will help stabilize the frosting (prevent the fats, water and air in the frosting separating).
-
Do not over whip as this will make for a poor frosting (due
to the fats coming out of emulsion to start forming butter).
-
Whip up 500 g of heavy cream with 40 g of icing sugar.
- Assemble the
torte:
- Place the
bottom-most slice of sponge cake on the cake base.
- Soak the sponge
slice liberally with the reserved cherry syrup.
Sponge cake is dry, so the more syrup you add, the moister your finished torte will be.
There is a limit to how much syrup should be added before the sponge turns mushy.
- Add a layer of
frosting.
- Add a layer of
cherry
purée.
-
Repeat with the other cake slices.
-
Now cover the top and sides of the assembly with frosting.
Use a cake palette or spatula for ease of working but the surface need not be perfectly smooth as it will be covered with chocolate shards or shavings at the last stage.
-
Decorate the frosted cake with the chocolate shards
(upright) and chocolate shavings (on the cake top).
-
Garnish with fresh cherries (with stems look good).
- Place the
bottom-most slice of sponge cake on the cake base.
-
Stand the finished torte in a refrigerator until
ready to serve.
Do try this recipe.
It is not difficult to make
a Black Forest Torte this way.
Enjoy!
26 May 2024
Created by Clem Kuek
